To cut and fit drywall around outlets and light switches, you'll need precise measuring techniques and the right tools. Start by tracing the exact fixture outline using a template, then carefully score and cut with a sharp utility knife. Measure twice, cut gradually, and use gentle scoring to guarantee smooth edges. Sand and finish with joint compound for a professional look. More expert tips await your exploration.
Essential Tools and Safety Equipment
When tackling a drywall project, having the right tools and safety equipment can make all the difference between a smooth installation and a frustrating experience. You'll need several key items to work safely and efficiently.
Start with power tool safety as your top priority by wearing safety glasses, dust masks, and work gloves to protect yourself. Essential tools include a utility knife, tape measure, drywall saw, straightedge, and drill.
Protective clothing like long-sleeved shirts and sturdy pants will shield you from potential cuts and debris. Always prioritize your safety while working with drywall materials. Expert drywall contractors in Erie, PA recommend using moisture-resistant drywall for areas with high humidity to ensure long-lasting installation.
Measuring and Marking Electrical Fixtures
Precise measurements are essential when cutting drywall around electrical fixtures to guarantee a clean, professional installation. You'll want to carefully trace the exact outline of outlets, switches, and junction boxes before making any cuts.
Proper wiring identification helps prevent accidental damage and verifies safety during the process. When planning your cutting pattern, use a pencil to mark precise dimensions, and double-check measurements before cutting.
Remember to measure twice and cut once—this approach minimizes waste and helps you achieve a tight, professional-looking fit around electrical components. Local drywall contractors in Erie, PA recommend using specialized tools and techniques for the most accurate electrical fixture cutouts.
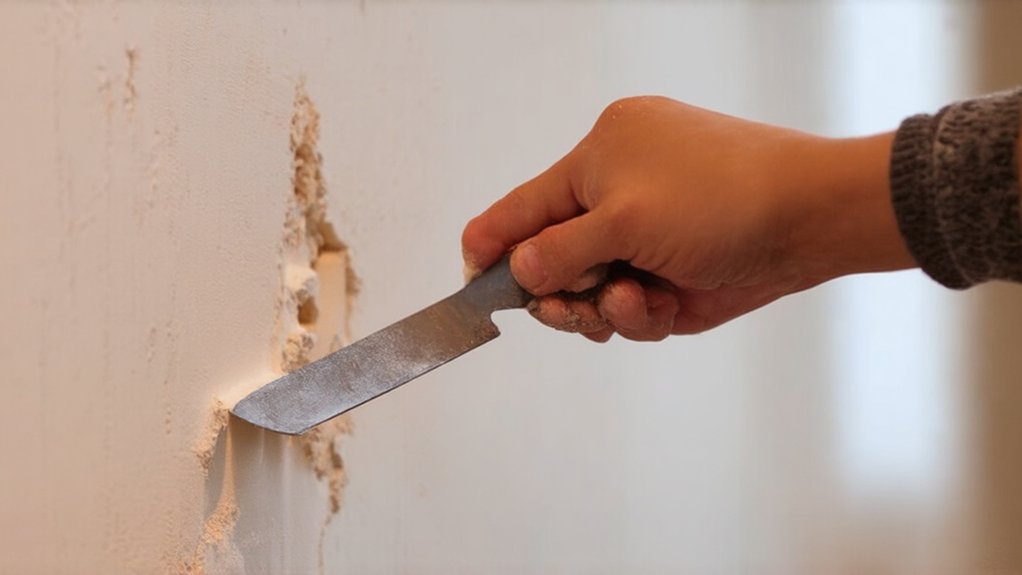
Techniques for Precise Drywall Cutouts
Because cutting drywall requires skill and patience, becoming adept at precise cutouts can convert a challenging task into a professional-looking project. You'll want to guarantee several key techniques to attain clean, accurate openings for electrical fixtures.
Start by using a template or cardboard guide to trace your exact cutout dimensions, which helps minimize drywall waste. Sharp utility knives and drywall saws are essential tools for creating precise cuts. Practice steady hand movements and gentle scoring techniques, cutting gradually through the material to secure smooth, even edges that'll integrate seamlessly with your electrical installations.
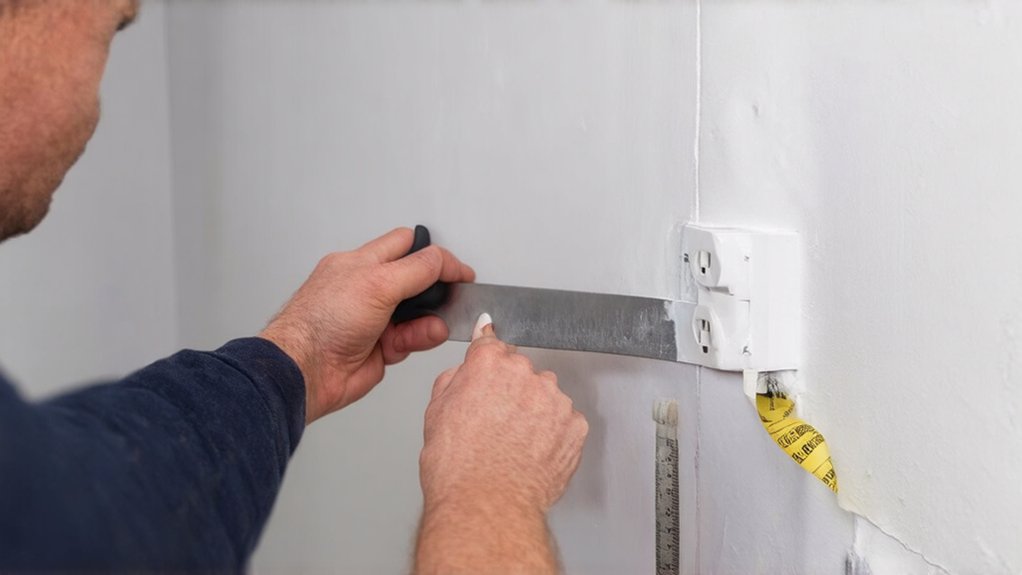
Installing and Fitting Drywall Sections
The art of drywall installation hinges on careful alignment and precise fitting, converting raw materials into smooth, seamless walls. You'll want to follow specific drywall installation patterns that guarantee tight, professional-looking seams.
When fitting sections, start by measuring twice and cutting once, which minimizes waste and creates cleaner edges. Pay special attention to drywall corner finishing, as these areas can make or break your project's overall appearance. Overlap edges slightly and use joint compound to create invisible shifts between panels.
With patience and practice, you'll develop the skills to alter your space with confidence.
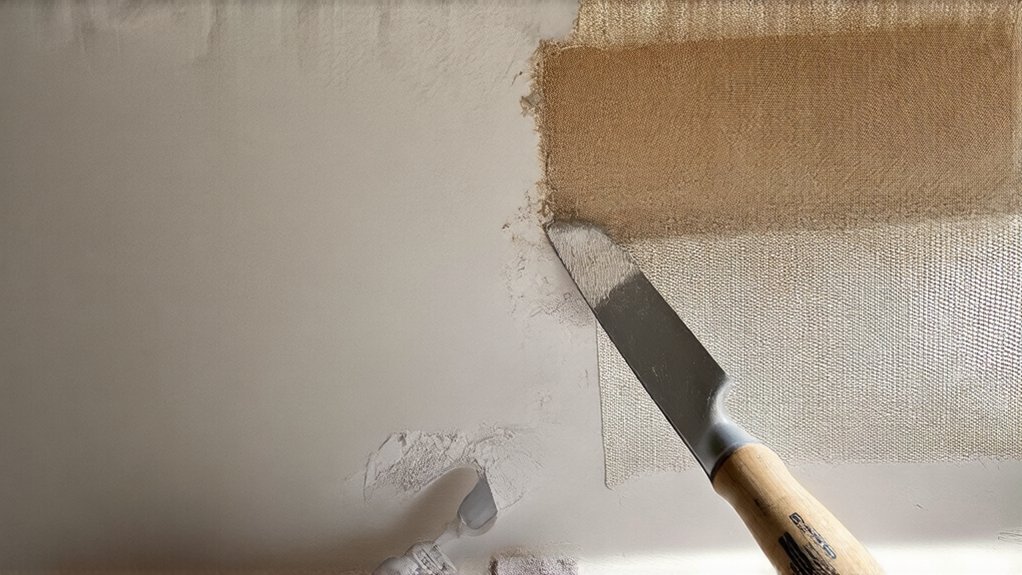
Finishing and Refinishing Outlet Openings
Often, outlet openings can become a challenging aspect of drywall finishing, requiring careful attention and precise technique. You'll want to use professional drywall patching techniques to create smooth, seamless edges around electrical boxes.
Start by applying a thin layer of joint compound, carefully feathering the edges to blend with surrounding surfaces. Sand gently between coats to achieve a perfect finish. Choose decorative outlet covers that complement your room's design, which can help hide minor imperfections and add a polished look. Patience and steady hands are key to achieving professional-looking results.
Frequently Asked Questions
Can I Install Drywall Without Professional Experience?
You can install drywall with some basic skills and patience. Learn alternative methods, watch tutorials, and start small. Don't be intimidated—many DIY enthusiasts successfully tackle this project by practicing and gaining confidence step by step.
How Dangerous Are Electrical Components During Drywall Installation?
You'll need to be cautious around electrical components. Always turn off power at the circuit breaker, use non-conductive tools, and wear insulated gloves to prevent shock hazards. Safety's key when you're working near live electrical outlets during drywall installation.
What if I Make a Mistake While Cutting Around Outlets?
If you make unexpected cutouts, you'll risk potential damage to wiring. Don't panic—measure twice, cut carefully, and use a drywall utility knife. If you mess up, you can always patch or replace the section, keeping your project on track.
Do I Need Special Skills to Cut Precise Drywall Openings?
You don't need special skills, just patience and precision. Learn accurate drywall measurement techniques and practice ensuring clean cuts. With the right tools and careful technique, you'll become an expert at outlet openings like a pro, joining the skilled DIY community.
How Long Does It Take to Complete a Drywall Outlet Project?
You'll typically spend 15-30 minutes per outlet, depending on your skill level. An experienced homeowner can complete 4-6 outlet cutouts in about 2 hours, making it a manageable DIY project that'll enhance your home improvement confidence.