You’ll want to start by measuring the hole and cutting a clean, rectangular patch using a drywall saw. Secure the new piece with screws, then apply mesh tape and joint compound around the edges. Smooth the tape carefully, feathering the edges with light strokes. Once dry, sand the area gently to create a seamless finish. Want to learn the pro techniques for a flawless repair?
Gathering Essential Tools and Materials
Before diving into your drywall repair project, you’ll need to gather a few key tools and materials.
Start by selecting appropriate drywall thickness that matches your existing wall—typically 1/2-inch for standard walls. Grab essential tools like a utility knife, drywall saw, measuring tape, sandpaper, and a putty knife.
You’ll also need joint compound, drywall screws, a drill, and mesh or paper tape. Guarantee proper lighting in your workspace to clearly see your repair area. Don’t forget protective gear like safety glasses and a dust mask.
Having everything ready will make your repair smooth and efficient. Experienced contractors recommend always checking your tools and materials before starting any drywall repair project.
Assessing the Damage and Preparing the Work Area
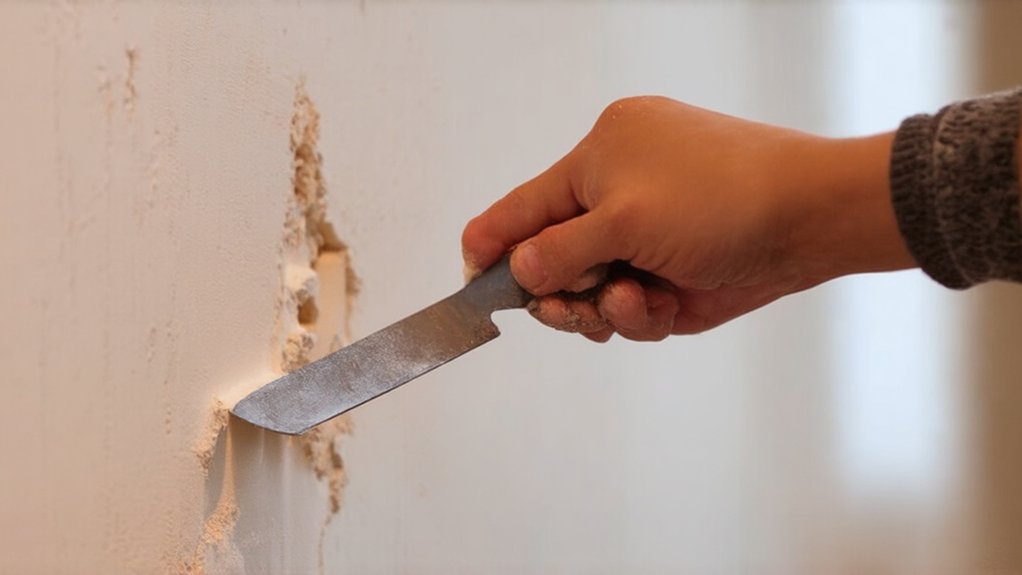
Since different types of wall damage require specific repair approaches, you’ll want to carefully examine the affected area. Start by measuring the hole size to determine the best patching method.
Inspect for hidden damage behind the wall, checking for moisture, electrical wiring, or plumbing that might need attention. Clear the workspace, removing furniture or covering floors with drop cloths. Guarantee good lighting and ventilation.
Drywall installation professionals recommend using high-density, moisture-resistant materials for a durable and long-lasting repair.
Gather your tools nearby and put on safety glasses. Take time to understand the extent of the damage before cutting, sanding, or applying patches, as a thorough assessment will help you achieve a professional-looking repair.
Cutting and Fitting the Drywall Patch
After carefully evaluating the wall damage, you’ll want to prepare for cutting and fitting a precise drywall patch. Your success depends on accurate measuring and sizing:
- Trace the damaged area with a pencil
- Use a drywall saw to cut a clean, rectangular opening
- Measure the exact dimensions of the framing opening
- Test-fit the new drywall piece before securing
- Guarantee the patch matches the wall’s thickness exactly
Cutting the patch requires precision and patience. You’ll want a snug fit that blends seamlessly with the existing wall, minimizing additional repair work and creating a professional-looking result.
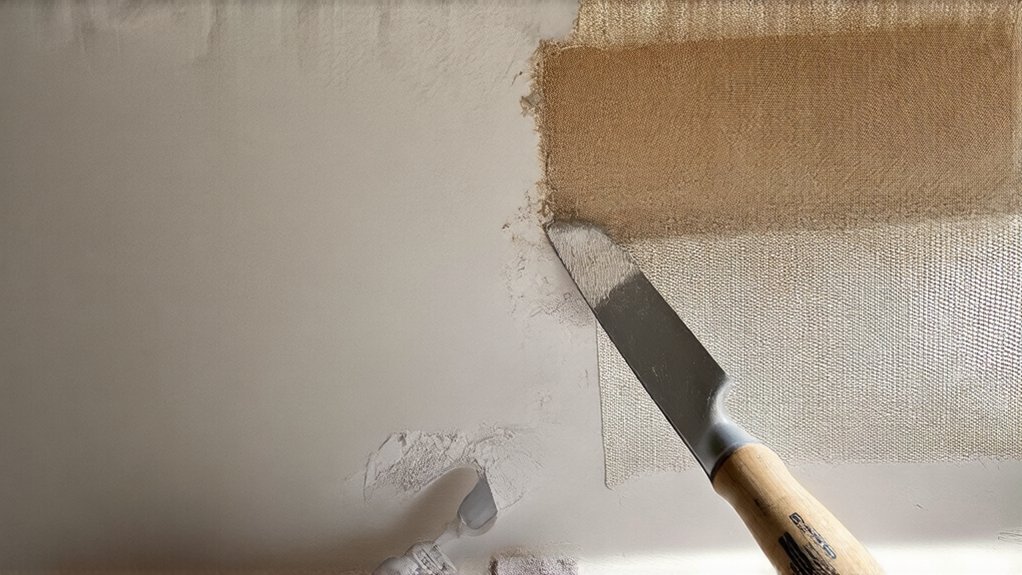
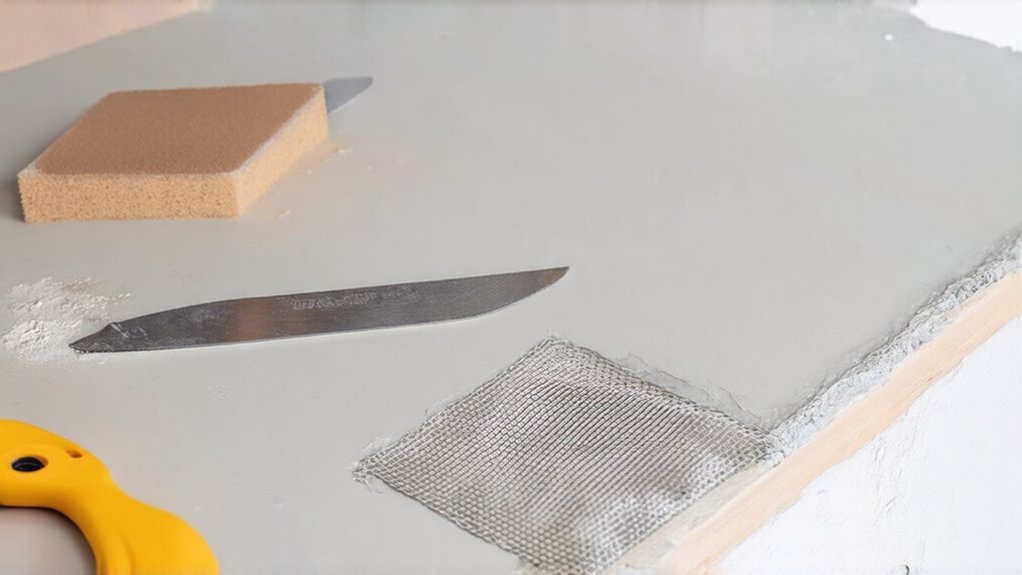
Applying Joint Compound and Tape
While joint compound and tape might seem intimidating, they’re essential for creating a smooth, seamless drywall repair. Start by applying a thin layer of joint compound around the patch’s edges, using a 4-inch drywall knife.
Press mesh tape directly over the seams, ensuring it’s centered. Gently smooth the tape, eliminating air bubbles and wrinkles. When feathering edges, use light, sweeping motions to blend textures and create a nearly invisible junction.
Let the first coat dry completely before sanding lightly and applying a second, wider coat to further smooth the repair area.
Sanding and Smoothing the Repaired Surface
Whenever you’re ready to smooth out your drywall repair, grab a fine-grit sandpaper (120-150 grit) and a sanding block or electric sander. Blending the compound requires patience and a gentle touch to achieve a smooth texture. Follow these steps:
- Sand in circular motions
- Apply light, even pressure
- Wear a dust mask and safety glasses
- Check progress frequently
- Wipe away dust with a clean cloth
You’ll want to create a seamless finish that matches the surrounding wall. Take your time, and don’t rush the process. Careful sanding guarantees a professional-looking repair that’ll make you proud of your handiwork.
Priming and Painting for a Seamless Finish
Since you’ve carefully sanded the repaired drywall area, it’s time to prime and paint for a flawless, invisible finish. Start by applying a quality primer that’ll help the paint adhere smoothly and hide any slight imperfections.
Once the primer dries, select a matching paint color that blends seamlessly with the surrounding wall. Use a roller or brush to apply thin, even coats, ensuring you’re achieving consistent texture. Let each coat dry completely before adding the next.
Feather the edges to prevent noticeable lines, creating a professional-looking repair that’ll make the patch virtually undetectable.
Frequently Asked Questions
Can I Patch Drywall Myself Without Professional Experience?
Yes, you can patch drywall yourself! With some basic drywall skillset and simple repair techniques, you’ll gain confidence. Watch online tutorials, grab the right tools, and take your time. You’ll become proficient in this DIY home improvement skill with practice.
How Long Does a Typical Drywall Repair Take?
Depending on your skill level, a small drywall repair typically takes 2-4 hours. You’ll need patience for applying compound, sanding, and painting. Don’t worry—with practice, you’ll get faster and more confident in your home repair skills.
Will Insurance Cover the Cost of Drywall Repairs?
You’ll likely be covered if the damage results from a sudden, accidental event. Check your policy’s insurance coverage requirements, document everything, and file an insurance claim process with detailed photos to increase your chances of approval.
What if I Discover Mold Behind the Damaged Drywall?
If you spot mold, don’t panic. You’ll want a professional mold assessment to determine the extent of contamination. The mold mitigation process involves careful removal, cleaning, and prevention to safeguard your home stays safe and healthy.
Are There Any Temporary Fixes Before Permanent Repair?
You’ll want quick fixes like temporary adhesive patches or drywall tape to cover the area immediately. Don’t leave exposed wall open – use mesh or sturdy tape to prevent further damage while planning your permanent repair.
Conclusion
You’ve successfully patched your drywall like a pro! With patience and the right techniques, you’ve restored your wall’s smooth surface. Remember that practice makes perfect, so don’t get discouraged if your first attempt isn’t flawless. Take your time, follow each step carefully, and you’ll achieve professional-looking results. Now step back and admire your handiwork—you’ve saved money and gained an important home repair skill.