Safely removing textured drywall finishes starts with testing for asbestos in homes built before the 1980s. You'll need protective gear like respirators, safety goggles, and plastic sheeting. Wet the wall surface with a spray bottle, allowing moisture to soften the texture before carefully scraping in small sections. Sand the wall with progressively finer grits, maintaining proper ventilation. This methodical approach helps you alter your walls smoothly and securely. Keep exploring for expert techniques.
Assessing Asbestos Risk Before Removal
Before you begin scraping away your textured drywall, it's indispensable to understand the potential asbestos risks lurking beneath the surface. Older homes, especially those built before the 1980s, might contain asbestos in their textured finishes.
You'll want to take the asbestos sampling process seriously to protect your health and safety. Professional asbestos testing requirements typically involve collecting small samples and sending them to a certified laboratory for analysis. Don't risk your well-being by guessing or skipping this pivotal step.
Hiring a professional inspector can provide peace of mind and guarantee you're making an informed decision about your home improvement project. Local drywall contractors in Erie, PA can often provide expert guidance on safely navigating textured surface removal.
Gathering Essential Tools and Materials
After confirming your wall's safety through asbestos testing, you'll want to collect the right tools and materials for removing textured drywall finishes. Proper ventilation and vital equipment are pivotal for a successful project. Drywall texture techniques vary depending on the specific pattern and application method used by professional installers.
Essential tools and materials include:
- Plastic sheeting for floor and furniture protection
- Respirator mask and safety goggles
- Wide scraper, spray bottle, and sanding equipment
You'll need to create a safe workspace that shields your home from debris and safeguards your health. Invest in quality protective gear and cover surrounding surfaces carefully. Preparation prevents messy complications and guarantees a smoother removal process.
Preparing Your Work Area for Drywall Texture Removal
Since textured drywall removal can quickly become a messy project, you'll want to carefully protect your working space before starting. Cover floors with thick plastic drop cloths, securing edges with painter's tape to prevent dust from spreading.
Use dust containment strategies like hanging plastic sheeting in doorways and sealing off adjacent rooms. Open windows to improve ventilation considerations and create air circulation that helps manage airborne particles.
Remove furniture or cover it completely with plastic. Wear protective gear like a dust mask, safety glasses, and work gloves to shield yourself from potential debris and irritants.
Wet Scraping Techniques for Textured Walls
When you're ready to tackle textured wall removal, wet scraping offers an effective method for breaking down and eliminating unwanted surface treatments. This technique simplifies the removal process by softening the texture before scraping.
- Wetting techniques help loosen stubborn wall textures
- Proper moisture prevents unnecessary wall damage
- Scraping methods require patience and gentle pressure
Use a garden sprayer or spray bottle to dampen the wall surface evenly. Allow the water to absorb for 15-20 minutes, which softens the texture. Then, carefully scrape with a wide putty knife or drywall scraper, working in small sections. Keep the surface consistently moist to minimize dust and make removal easier.
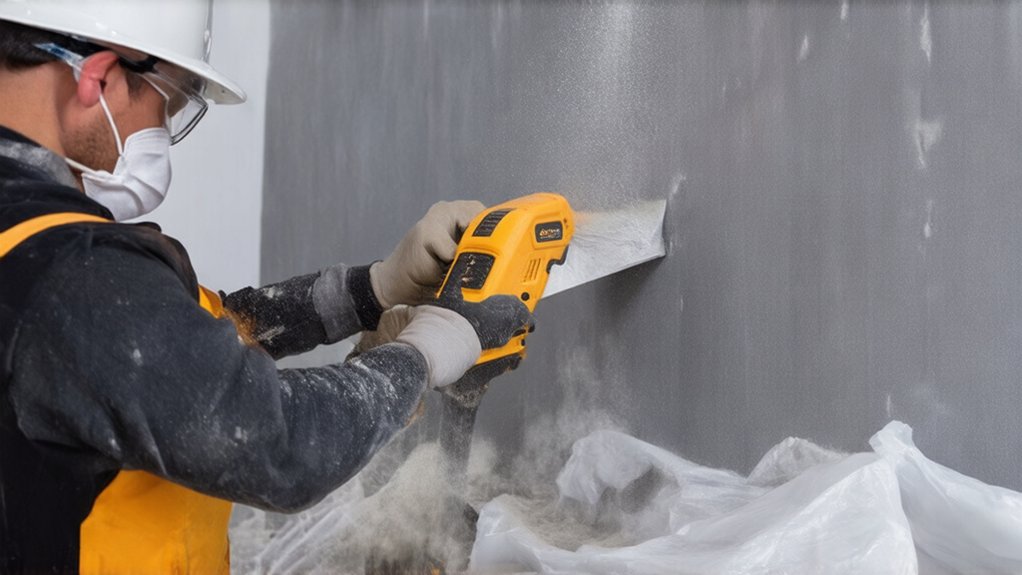
Sanding and Smoothing the Wall Surface
Sandpaper becomes your primary ally in creating a smooth, uniform wall surface after removing textured drywall. Start with coarse-grit sandpaper (60-80 grit) to level uneven areas, gradually shifting to finer grits for a polished finish. Wear a dust mask and safety glasses to protect yourself during dust mitigation.
Guarantee proper ventilation by opening windows and using fans to circulate air. Work systematically, sanding in circular motions and maintaining consistent pressure. Check your progress frequently, feeling the wall's surface for smoothness. Once satisfied, wipe down the wall with a damp cloth to remove remaining dust.
Repairing and Priming Drywall After Texture Removal
After smoothing your walls with careful sanding, you'll want to address any imperfections before applying a fresh coat of paint. Drywall patching techniques are vital for creating a flawless surface that looks professionally finished.
- Inspect walls carefully for small holes, cracks, and uneven surfaces
- Use lightweight spackling compound for minor repairs
- Apply joint compound with a wide putty knife for larger imperfections
Dealing with uneven surfaces requires patience and precision. You'll need to fill gaps, sand repair areas smoothly, and prime the entire wall to guarantee a uniform, professional-looking finish that'll make you proud of your hard work.
Painting and Finishing Your Smooth Walls
With countless homeowners keen to change their textured walls, painting becomes the final, satisfying step in your drywall renovation path. Choosing suitable paint finishes is vital for maintaining a smooth wall finish that looks professional and clean.
Select a paint with low-sheen properties like eggshell or satin, which help hide minor imperfections from your texture removal process. These finishes will give your walls a polished appearance while being easy to clean.
Apply primer first to guarantee even coverage, then use quality rollers and brushes for a smooth, uniform paint application that alters your space.
Frequently Asked Questions
How Long Does the Entire Textured Drywall Removal Process Typically Take?
You'll find the project timeline varies, but typically, you're looking at 2-3 days for proper preparation techniques and removal. Your room's size and complexity will impact the overall duration, so plan accordingly.
Will Removing Textured Walls Increase My Home's Resale Value?
You'll likely [enhance] your home's potential resale value with smooth walls, as modern buyers prefer clean, updated finishes. Investing in home renovation value can [heighten] more interested buyers and potentially [augment] your property's marketability and overall worth.
Can I Remove Textured Walls Myself or Should I Hire Professionals?
You can DIY textured surface preparation, but professional assistance recommendations suggest complex jobs might require expert help. Consider your skill level, time, and project complexity before deciding to tackle the wall texture removal yourself.
What Are the Average Costs Associated With DIY Texture Removal?
You'll spend around $200-$500 for DIY texture removal, including rental equipment costs and materials. Labor savings can be significant, but be prepared for potential challenges. Your careful approach can help you save money while altering your space.
How Messy Is the Process of Removing Textured Drywall Finishes?
Texture removal can get really messy, creating dust that impacts indoor air quality and poses potential health hazards. You'll want protective gear and plastic sheeting to minimize the chaos and keep your workspace clean and safe.