To match an existing wall texture on a drywall patch, you'll need to carefully observe the original surface's pattern and thickness. Experiment with spray texture, rollers, or hand techniques on a scrap piece of drywall first. Clean and prepare the repair area with great care, then apply joint compound with precision. Practice and patience are key to creating a seamless repair that blends perfectly. Persevere, and you'll become an expert at this home repair skill.
Identifying Your Wall Texture Type
When you're preparing to patch a drywall section, recognizing your wall's specific texture type is a crucial first step. Wall texture identification requires careful observation and sample preparation. Look closely at your walls' surface patterns, noting whether they appear smooth, orange-peel-like, knockdown, or have a more intricate swirl design. You'll want to study the texture from multiple angles and lighting conditions to guarantee accurate recognition. Take a small sample or photograph for comparison if needed. Texture patterns like knockdown can be skillfully applied by professional drywall technicians to ensure a consistent and visually appealing finish. Understanding your wall's unique texture helps you select the right tools and techniques for a seamless repair that blends perfectly with the existing surface.
Preparing the Drywall Repair Area
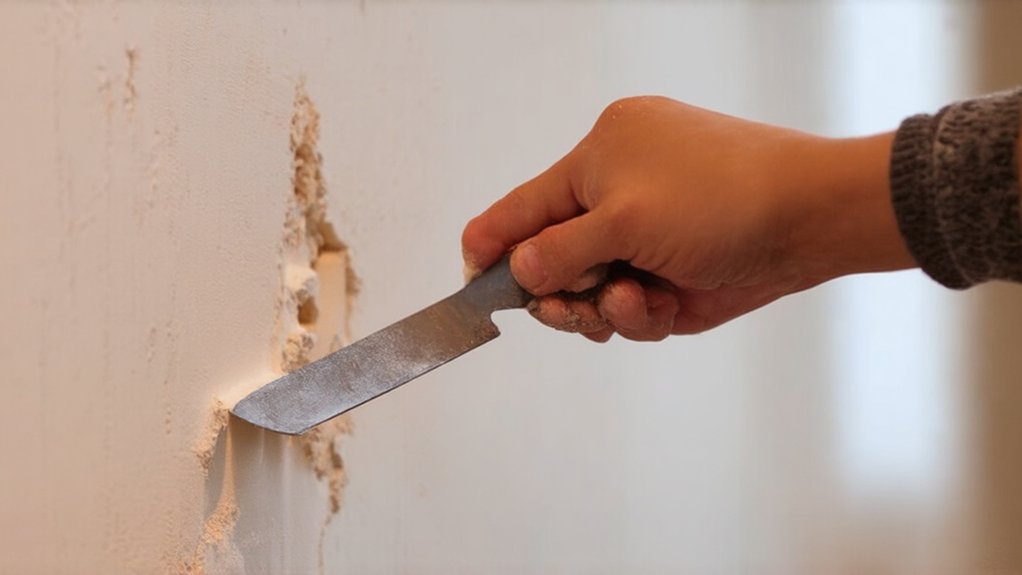
Before you begin patching your drywall, properly preparing the repair area guarantees a smooth, professional-looking result. Checking wall conditions is paramount for a successful repair. Drywall repair professionals in Erie, PA recommend meticulous preparation techniques to ensure optimal outcomes.
Key preparation steps include:
- Remove loose or damaged drywall
- Clean the repair area thoroughly
- Sand edges smooth
- Apply painter's tape around repair zone
- Ensure optimal lighting for accurate work
Evaluating the repair area helps you anticipate potential challenges. You'll want to inspect the surrounding wall for hidden issues like moisture damage or uneven surfaces. Taking time to prepare with great care sets the foundation for a flawless texture match that'll blend seamlessly with your existing wall.
Techniques for Matching Different Wall Textures
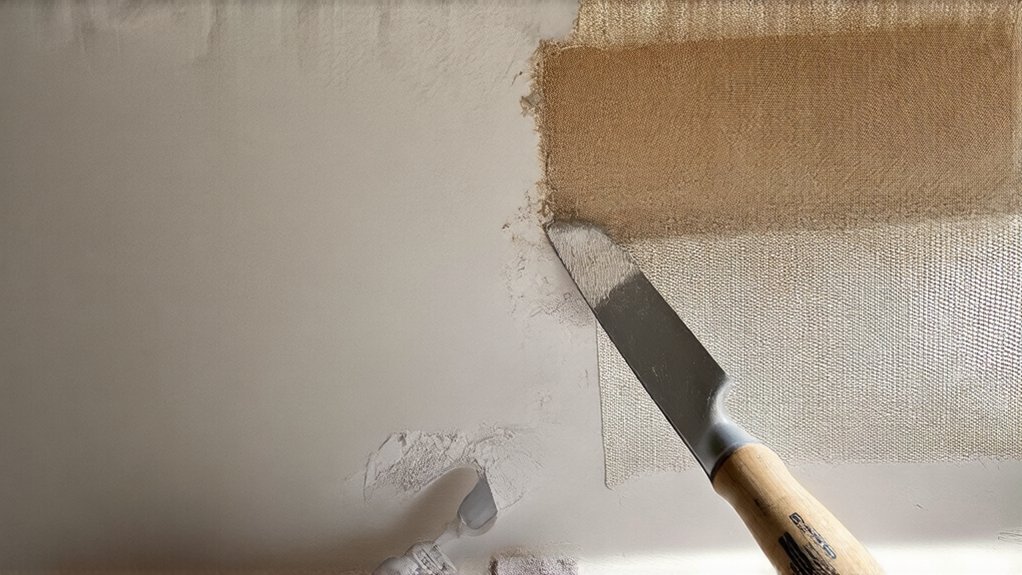
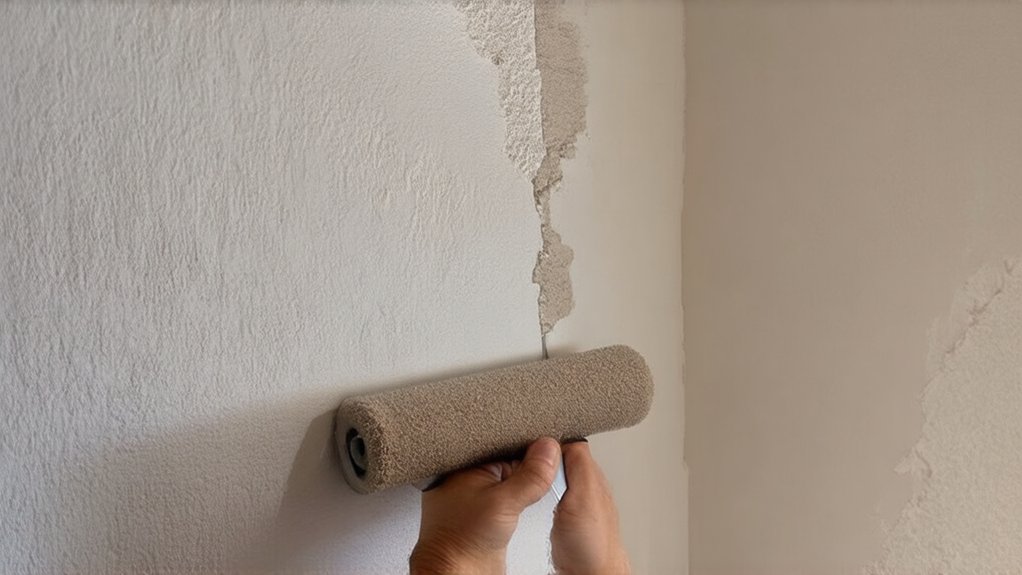
After carefully preparing your repair area, matching wall texture becomes the next crucial skill in achieving a seamless drywall patch. Different texture application methods require specific tools and techniques. You'll want to experiment with spray texture, hand-applied texture, or rollers depending on your wall's existing pattern.
Texture material considerations include matching the thickness, pattern consistency, and paint sheen of the original surface. Practice on a scrap piece of drywall first to perfect your technique. By taking your time and paying attention to detail, you'll create a repair that blends perfectly with the surrounding wall.
Tools and Materials You'll Need
Gearing up for a drywall texture match requires gathering a specific set of tools and materials to guarantee a professional-looking repair. You'll want to carefully select the right equipment to confirm your patch blends seamlessly with the existing wall.
Essential items for your project include:
- Drywall compound (joint compound)
- Texture matching brush or roller
- Spray texture gun (optional)
- Plastic drop cloths
- Sandpaper and sanding block
When purchasing required tools, focus on quality and compatibility with your specific wall texture. Selecting appropriate materials will make the difference between a noticeable patch and an invisible repair.
Step-by-Step Texture Matching Process
With your tools and materials ready, matching your wall's texture becomes a methodical process that rewards patience and accuracy. Start by practicing your technique on a scrap piece of drywall, adopting a trial and error approach to understand the texture's nuances.
If you're unsure, consider professional consultation to guarantee the best results. Practice different application methods, experimenting with spray textures, hand-applied techniques, or specialized rollers. Pay close attention to your existing wall's pattern, angle of application, and thickness of texture material. Blend carefully, and don't rush the process.
Frequently Asked Questions
Can I Texture Match Walls if I Have No Prior Experience?
You can learn texture matching skills with practice! Don't worry about perfection. YouTube tutorials and practice boards will help you develop texture application methods. Start small, be patient with yourself, and you'll improve quickly.
How Long Does a Professional-Looking Wall Texture Patch Typically Take?
You'll need about 1-2 hours for a professional-looking patch, depending on your skill level. Don't worry if you're new—with patience and practice, you'll quickly learn the techniques to achieve a seamless, matching wall texture.
Will My Repaired Wall Texture Look Exactly the Same as Original?
You'll likely notice slight differences in texture consistency, but a skilled professional can achieve near-perfect visual uniformity. While it won't be identical, a well-executed patch can blend seamlessly, making imperfections almost imperceptible to the untrained eye.
What if My Wall Has an Uncommon or Complicated Texture Pattern?
You'll face challenges with uncommon texture patterns, but don't be concerned. Complex texture replication demands patience and skill. Contemplate hiring a professional who specializes in matching unique wall textures to verify a seamless, professional-looking repair.
Are There Budget-Friendly Alternatives to Professional Texture Matching Techniques?
You'll find DIY texture matching techniques surprisingly affordable! Grab a few budget-friendly texture match supplies like spray textures, stencils, and practice boards. With patience and creativity, you'll blend that patch seamlessly without breaking the bank.