Drywall seams become visible due to poor installation techniques like improper board mounting, incorrect joint compound application, or uneven fastener placement. You'll want to focus on precise material selection, using high-quality mesh tape and lightweight joint compound. Professional taping requires multiple thin layers, firm tape application, and systematic seam coverage. Careful sanding with progressively finer grits and strategic lighting can help minimize seam appearance. Keep reading to perfect the art of seamless walls.
Common Causes of Visible Drywall Seams
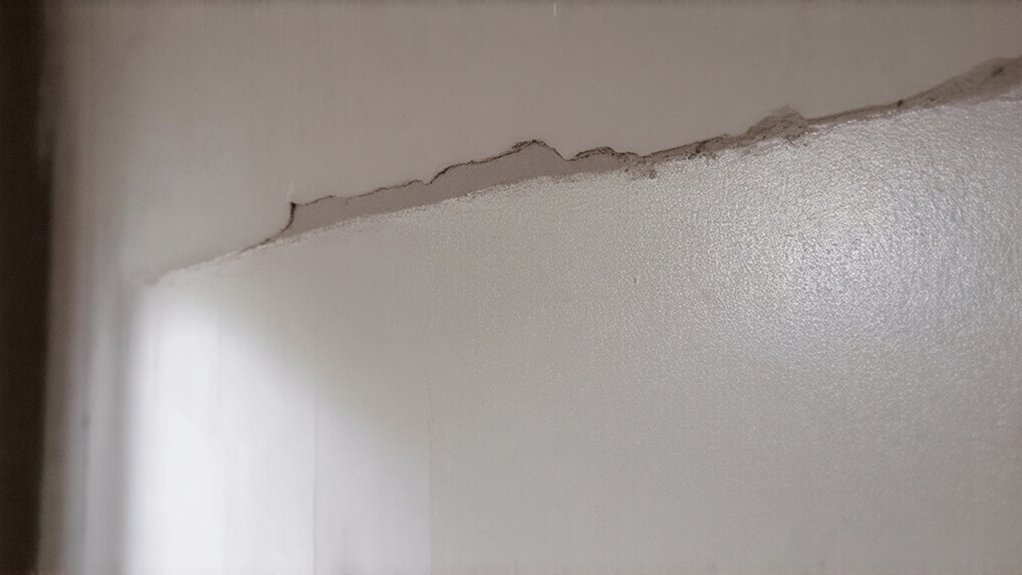
Visible drywall seams can be a frustrating issue for homeowners and DIY enthusiasts alike. When improper board installation occurs, these unsightly lines become more prominent and distracting.
You'll often notice seams appearing due to incorrect fastener placement, which prevents the boards from sitting flush against each other. These imperfections can make your walls look unfinished and unprofessional, undermining the overall aesthetic of your space.
Poor installation techniques, such as inadequate spacing or uneven mounting, contribute extensively to seam visibility. Drywall installation experts in Erie, PA recommend precise cutting and careful measurement to minimize visible seams. By understanding these common causes, you'll be better equipped to prevent and address drywall seam problems.
Choosing the Right Materials for Seamless Walls
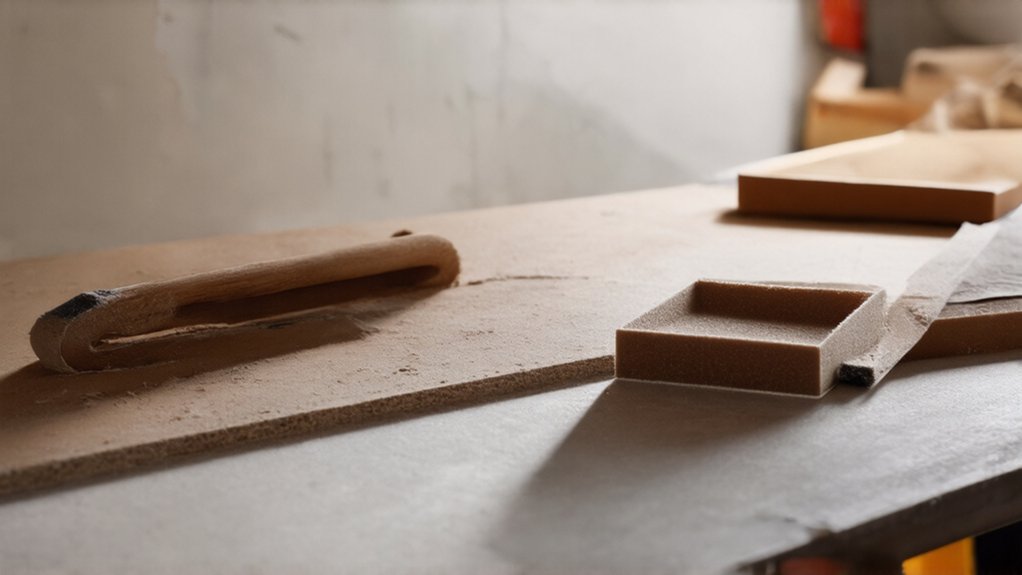
When tackling drywall installation, selecting the right materials can make all the difference in achieving a flawless, seamless finish. Your joint compound selection matters more than you might think—opt for lightweight, all-purpose compounds that blend smoothly and sand easily. Experienced drywall contractors in Erie, PA recommend using professional-grade tools and techniques to ensure optimal results. Professional-grade drywall primer application is indispensable for creating an even surface that conceals seams effectively. You'll want to choose high-quality mesh tape for reinforcing joints and select drywall sheets with minimal imperfections. By investing in superior materials and understanding their proper application, you can alter your walls from visibly seamed to perfectly smooth, giving your space a polished, professional appearance.
Professional Taping and Mudding Techniques
After carefully selecting top-quality materials, perfecting professional taping and mudding techniques will modify your drywall installation from amateur to expert-level. You'll want to apply joint compound smoothly and evenly, using a wide knife to spread it across seams.
Effective joint tape usage involves pressing the tape firmly into the compound, eliminating air bubbles and ensuring a seamless finish. Work systematically, starting from the center of each seam and feathering outward. Multiple thin layers are better than one thick application, as they'll dry more uniformly and create a smoother surface for painting.
Sanding and Smoothing Strategies
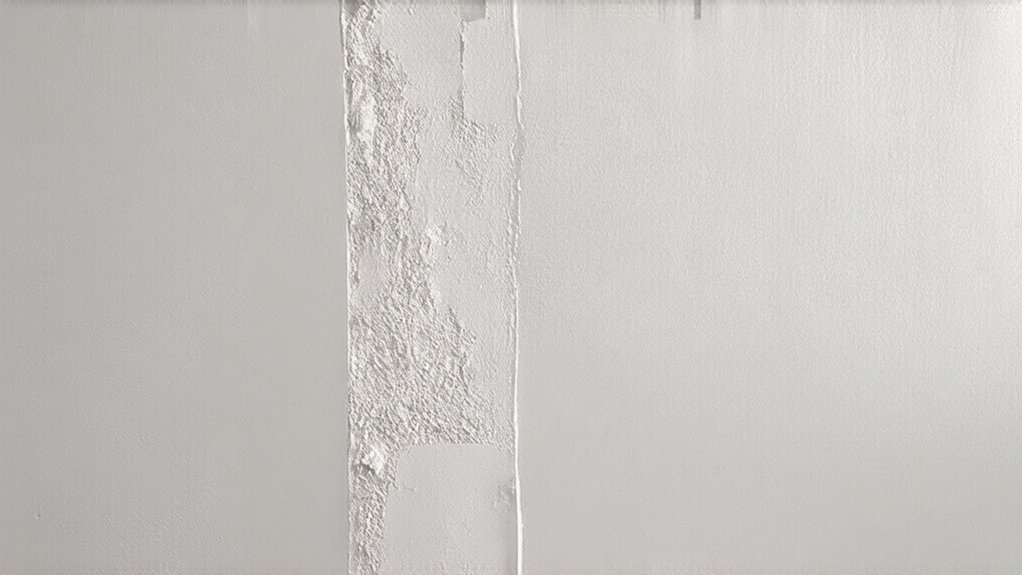
The art of sanding converts rough, uneven drywall surfaces into smooth, professional-looking walls that'll make your renovation project shine. You'll want to become proficient in feathering techniques, which help blend joint compound seamlessly and eliminate visible seams.
Start with coarse-grit sandpaper and gradually shift to finer grits for the smoothest finish. Apply proper sanding pressure—too much can create gouges, while too little won't effectively smooth the surface. Take your time, work in good lighting, and use a sanding block for consistent results.
Lighting and Its Impact on Drywall Appearance
Every homeowner knows that drywall appearance can dramatically alter depending on how light hits its surface. Uneven lighting patterns can expose imperfections you've worked hard to conceal, casting harsh shadows that highlight seam irregularities.
You'll want to strategically position lighting to minimize shadow accentuation, which means avoiding direct overhead or side lighting that creates dramatic contrasts. Consider using softer, diffused light sources that spread evenly across walls, reducing the likelihood of revealing minor bumps, ridges, or uneven tape joints.
Your careful preparation and finishing techniques will shine through.
Preventive Measures for Future Drywall Projects
When beginning future drywall projects, strategic planning can greatly reduce potential seam-related challenges. You'll want to focus on proper substrate preparation, ensuring your surface is clean, smooth, and perfectly level before installation.
Moisture control methods are pivotal; they'll help prevent warping, bubbling, and future seam visibility. By selecting high-quality materials and using precise installation methods, you can minimize potential issues.
Careful joint compound application, using the right tools and techniques, will create seamless walls that look professional and polished. Your attention to detail now will save significant time and frustration later.
Frequently Asked Questions
Can I Hide Drywall Seams Without Completely Replacing the Wall?
You can hide drywall seams without full replacement by applying proper taping techniques and professional skim coating. It's a DIY-friendly solution that'll help you achieve a smooth, seamless wall that looks flawlessly finished.
How Long Does Professional Drywall Finishing Typically Take?
You'll typically need 2-3 days for professional drywall finishing, depending on the room's size and complexity. A skilled contractor's capability guarantees smooth, seamless walls that'll make you feel proud of your space's polished, professional appearance.
Are Some Paint Finishes Better at Concealing Wall Imperfections?
You'll want to choose semi-gloss or textured paint finishes to hide wall imperfections. These options help blend seams and create a smoother look, making your space feel more polished and welcoming to you and your guests.
What's the Most Common DIY Mistake When Fixing Drywall Seams?
You'll likely mess up by skimping on joint compound layers and rushing through sanding. Novice DIYers often apply too little compound, creating uneven surfaces, and don't take the time to smooth seams perfectly, leaving visible imperfections.
Can Temperature and Humidity Affect Drywall Seam Visibility?
Ambient temperature variations and fluctuating humidity levels can absolutely wreak havoc on your drywall seams. You'll notice more pronounced seams when moisture causes expansion and contraction, making your walls look uneven and less polished.